How to Add an Extra IP to CentOS 7?
At first, we need to know the NIC name and to find it out, login as root and insert the following command:
ip a
Here's an example of the output:
As you see in the output, the NIC name used for this demonstration is eno16777984 and the IP is 185.94.191.114. To change the NIC IP or to add more IPs, we should open the “/etc/sysconfig/network-scripts/eno16777984” file with an editor done through the command below:
vi /etc/sysconfig/network-scripts/ifcfg-eno16777984
Please Note: that eno16777984 is the demonstration server’s NIC name and will be different for your vps server.
The opened configuration file should look like this:
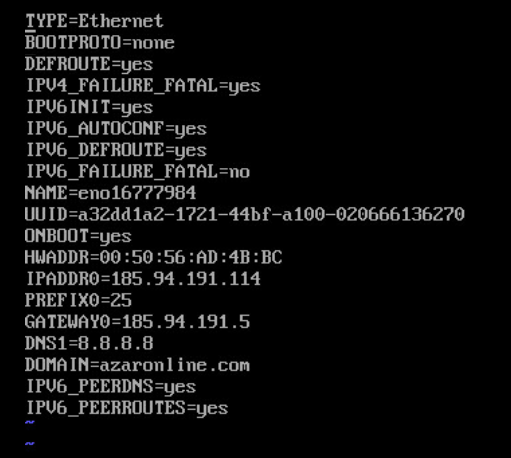
Now press ‘i’ to edit the file and enter the new IP address that you want to add as IPADDR1 like shown in the picture below. If this new IP is in a different subnet, enter the gateway and subnet mask as GATEWAY1 and PREFIX1.
Note that Prefix means the number of ‘1’ in the subnet mask.
After editing the file, press ‘esc’ and then type the ‘:wq’ to save and exit the file.
Now the only thing left to do is to restart the network by typing the following command:
/etc/init.d/network restart
Congratulations, you have successfully added a new IP to your NIC through CentOS 7.
